Assign Meter in the Add Meter Process
Step-by-Step Process for Assigning a Meter
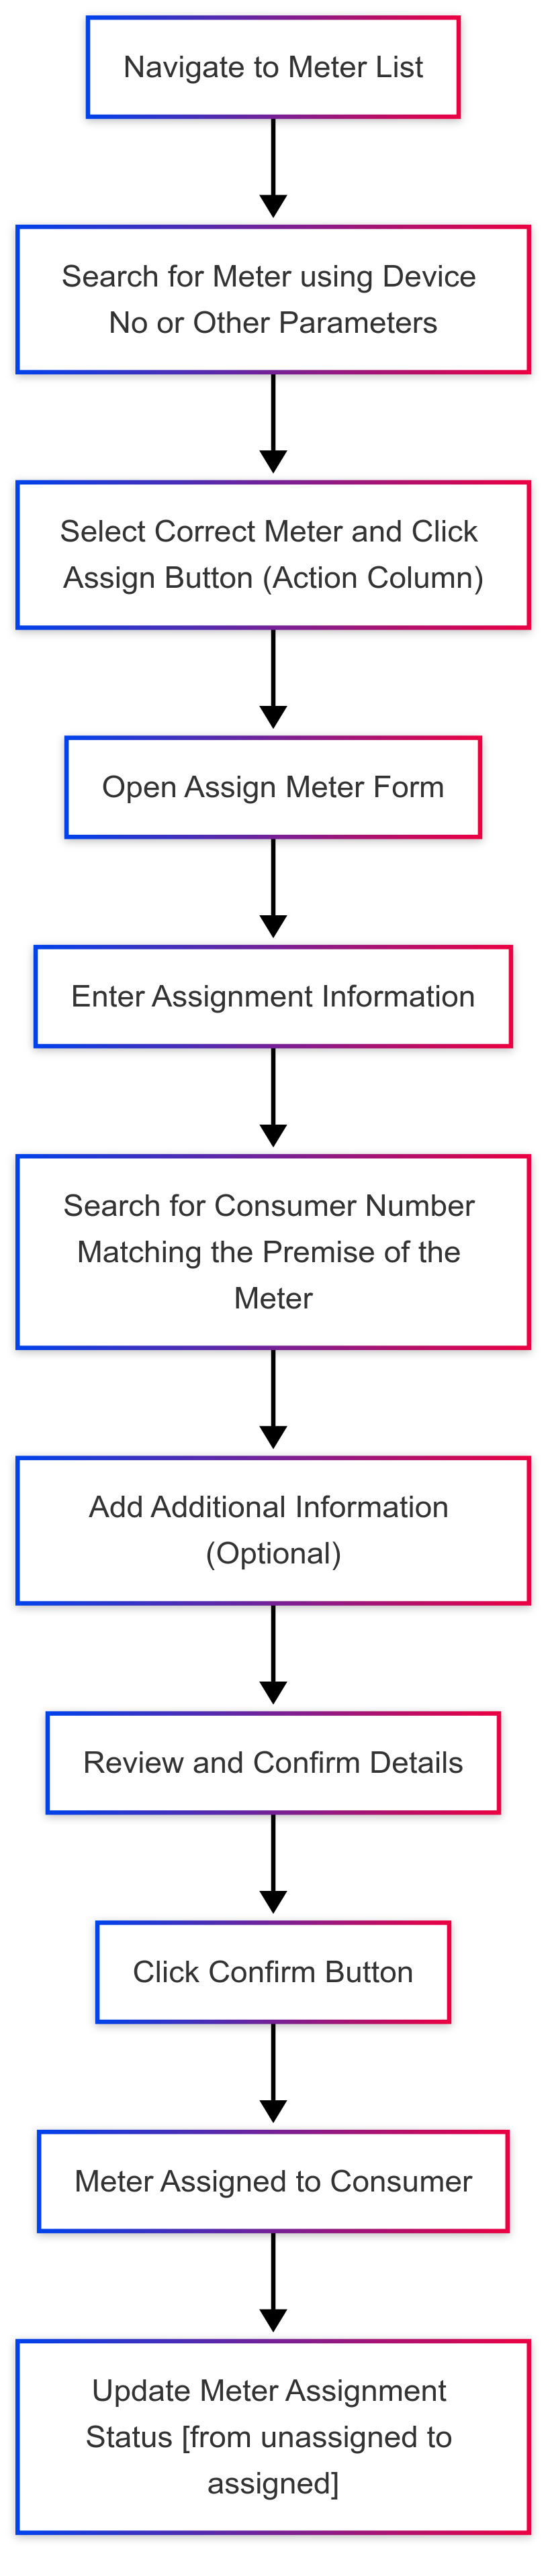
In the Add Meter process, once a meter has been successfully added, you have the option to assign the meter directly from the List View. The assignment process is streamlined through the Action Column, where you will find an Assign option. Follow these steps to assign a meter:
- After adding the meter, go to the Meter List View.
- This view displays all meters with key details such as Device No, Utility Service, Category, and Status.
- Use the Search Bar to find the specific meter using its Device No or other relevant parameters.
- Double-check the displayed details to ensure you’ve selected the correct meter.
- In the Action Column corresponding to the desired meter, click on the Assign button.
- This will open the Assign Meter form.
Provide the necessary information in the form using the following fields:
- Meter Details:
- Meter No: Pre-filled with the meter number (e.g., MtrNo4504).
- Device No: Pre-filled with the device number (e.g., MN123).
- Utility Service: Pre-filled based on the meter type (e.g., Water).
- Read Type: Pre-filled with the reading type (e.g., Photo Meter).
- Meter Ownership: Pre-filled with the ownership status (e.g., Individual).
- Premise Details:
- Premise: Pre-filled with the assigned location (e.g., S05-DMA01-V-MANASE-B1).
- Assignment Information:
- Consumer No: Enter the unique consumer number. (Mandatory)
- First Reading: Enter the initial meter reading. (Mandatory)
- First Reading Date: Select the date of the first reading. (Mandatory)
- Reading Status: Select the current reading status from the dropdown. (Mandatory)
- Reason Code: Choose the appropriate reason code if applicable. (Optional)
- Additional Information:
- Upload Photo: Attach a photo of the meter using the Click to Upload button. (Optional)
- Remark: Add any relevant comments or notes. (Optional)
5: Confirm and Save
- Review all the provided details carefully.
- Click on the Confirm or Save button to complete the assignment.
Note:
- Meter Assignment Status:
- The meter can only be assigned if its status is Unassigned.
- If the meter status is not Unassigned, the Assign option will be disabled or unavailable, preventing further assignment actions

No Comments