Skip to main content
Add Meter
Step-by-Step Process for Adding a Meter
- Navigate to the Mx Module :
- Navigate to Meter Master -> Add Meter
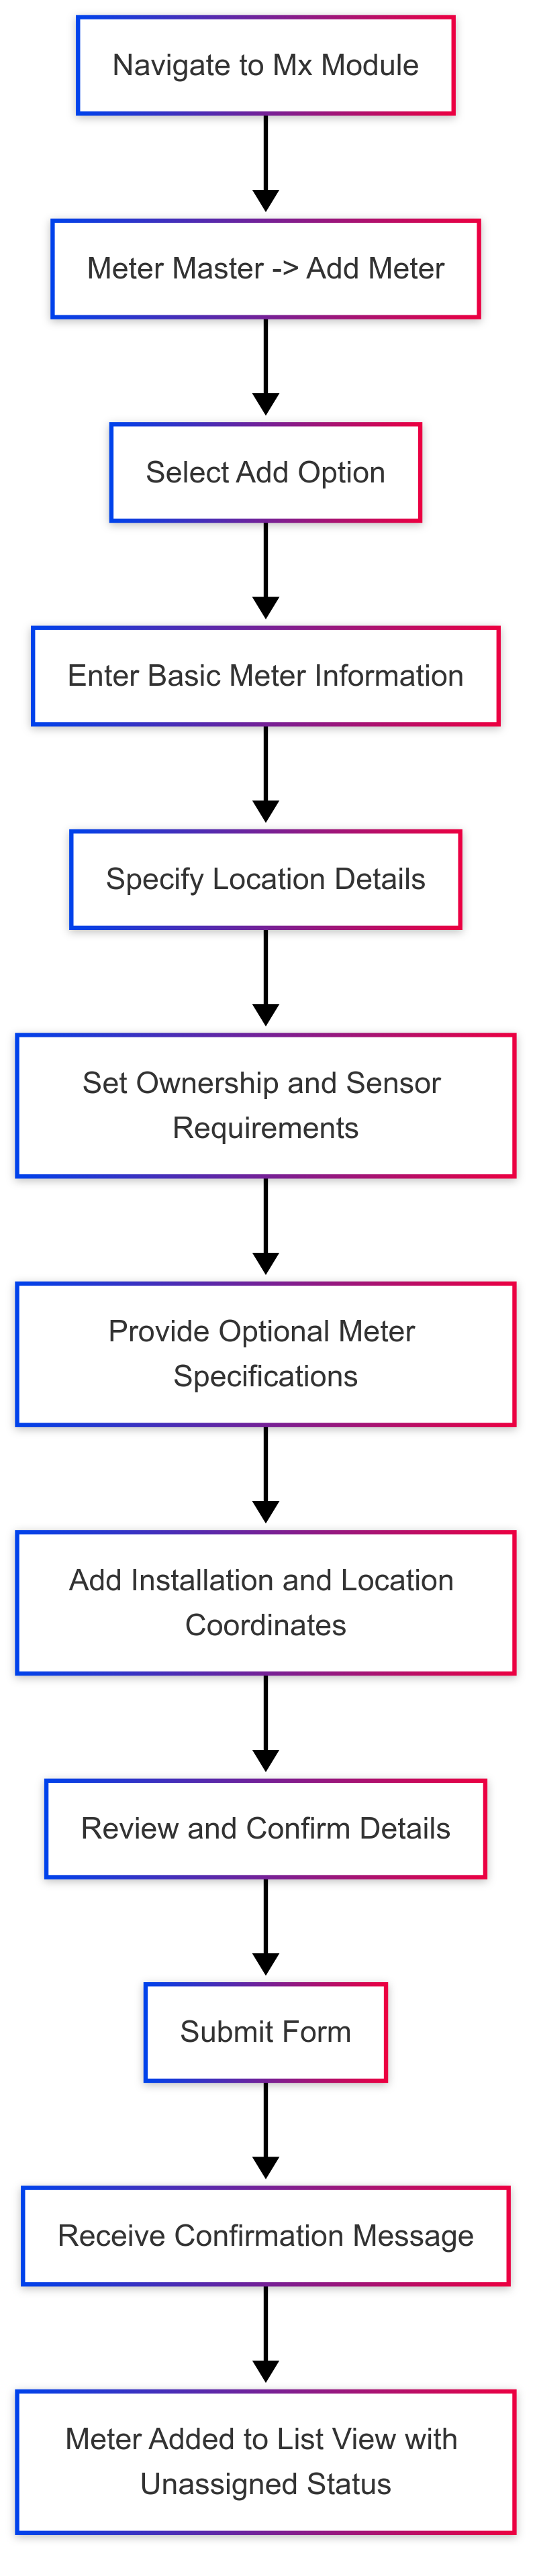
- Select the "Add " option.
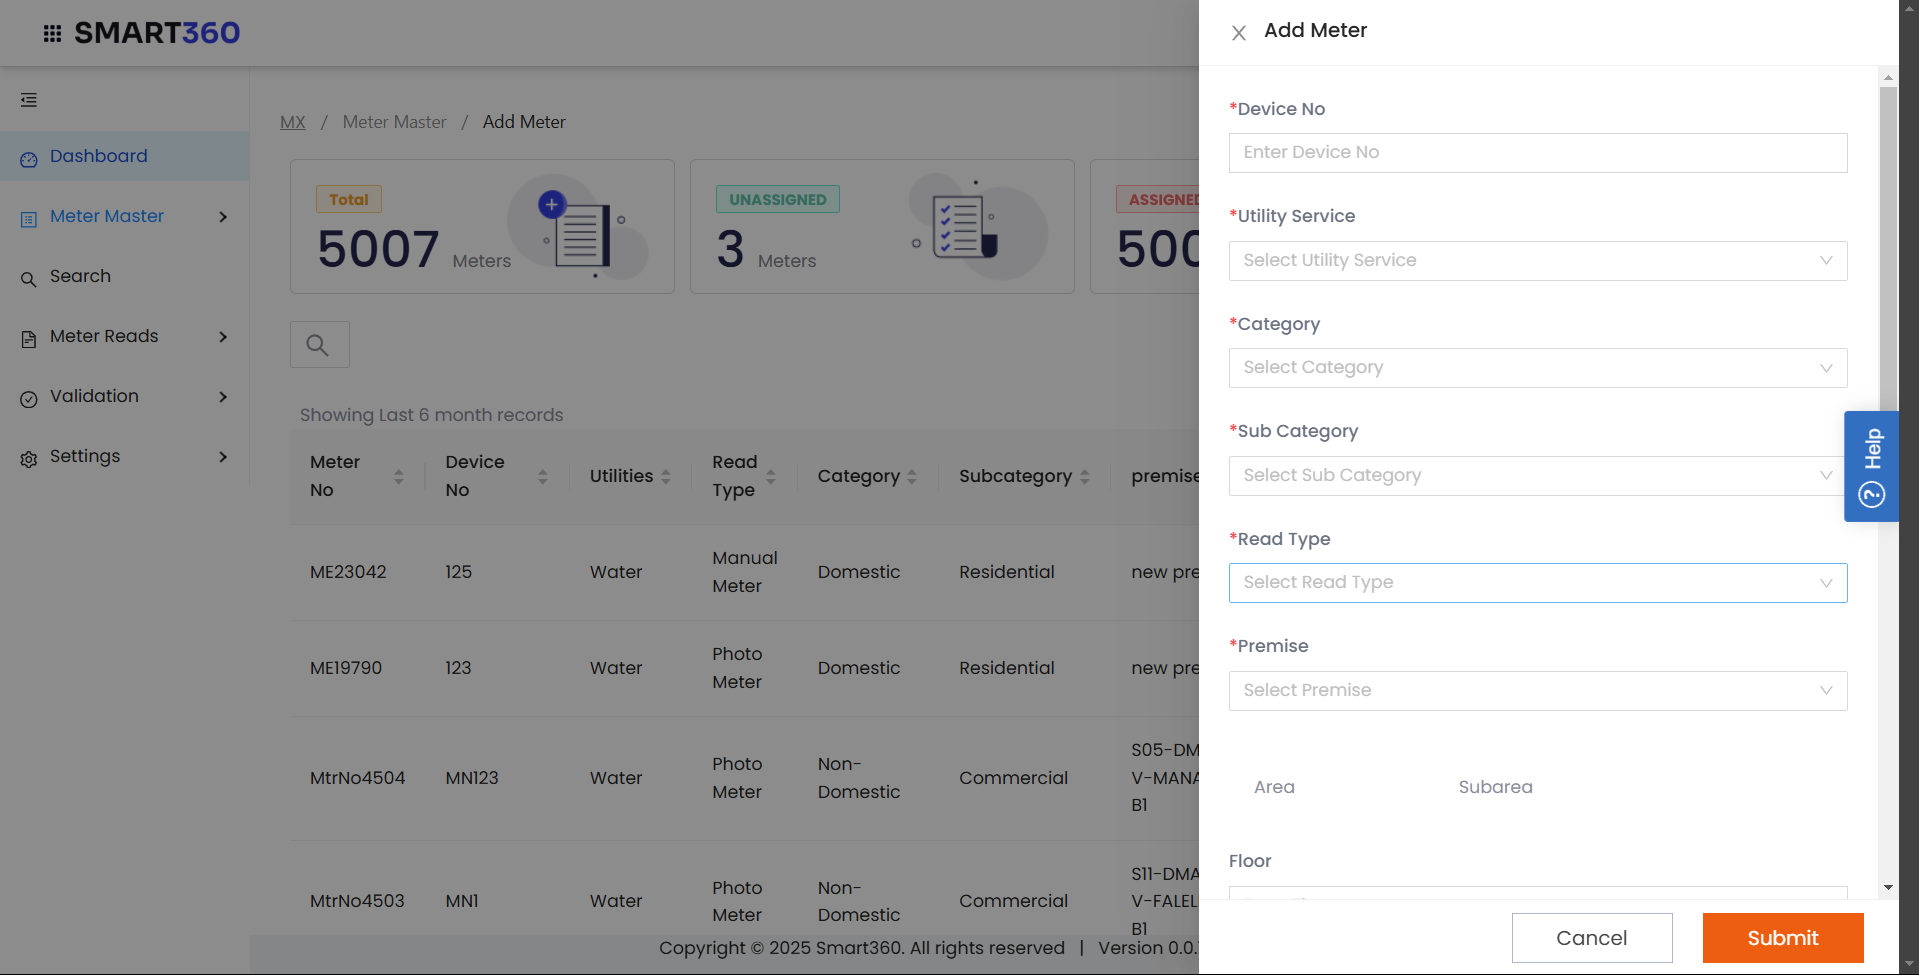
- Enter Basic Meter Information:
- Device No: Enter a unique device number. This is a mandatory field.
- Utility Service: Select the type of utility service (Electricity, Water, or Gas) from the dropdown.
- Category: Choose the relevant category (e.g., Residential, Commercial, or Industrial).
- Sub Category: Select a subcategory that further specifies the meter type.
- Read Type: Choose how the meter readings will be taken (Manual, Smart, Photo etc.).
- Specify the Location Details:
- Premise: Select the appropriate premise from the available options.
- Area: Autofill after selecting the premise
- Subarea: Autofill after selecting the premise
- Floor: Enter the floor number if the meter is installed in a multi-story building.
- Unit: Mention the unit or apartment number, if applicable.
- Set Ownership and Sensor Requirements:
- Meter Ownership: Specify whether the meter is Utility-Owned or Customer-Owned (e.g Master , Individual,Sub-Account.)
- Sensor Required: Choose Yes or No to indicate if a sensor is needed for remote or automated readings.
- Provide Meter Specifications (Optional):
- Meter Make: Select the manufacturer or brand of the meter.
- Meter Model: Choose the model of the meter.
- Meter Size: Enter the size or capacity of the meter (typically used for gas or water meters).
- Meter Dial: Specify the number of dials on the meter if it’s a manual reading meter.
- Add Installation and Location Coordinates:
- Installation Date: Enter the date when the meter was installed. This is a mandatory field.
- Latitude and Longitude: Provide geographical coordinates if needed for tracking or remote management.
- Review and Confirm:
- Review all entered information for accuracy.
- Ensure mandatory fields are filled, and data is valid.
- Submit the Form:
- Click on the “Submit” button to add the meter.
- A confirmation message will appear if the submission is successful.
- The meter will be display in the list view of the meter with assignment status unassigned.
No Comments