Assign Meter in Cx Module
Step-by-Step Process for Consumer Activation and Meter Assignment
Follow these steps to activate a consumer and assign a meter in CX Module: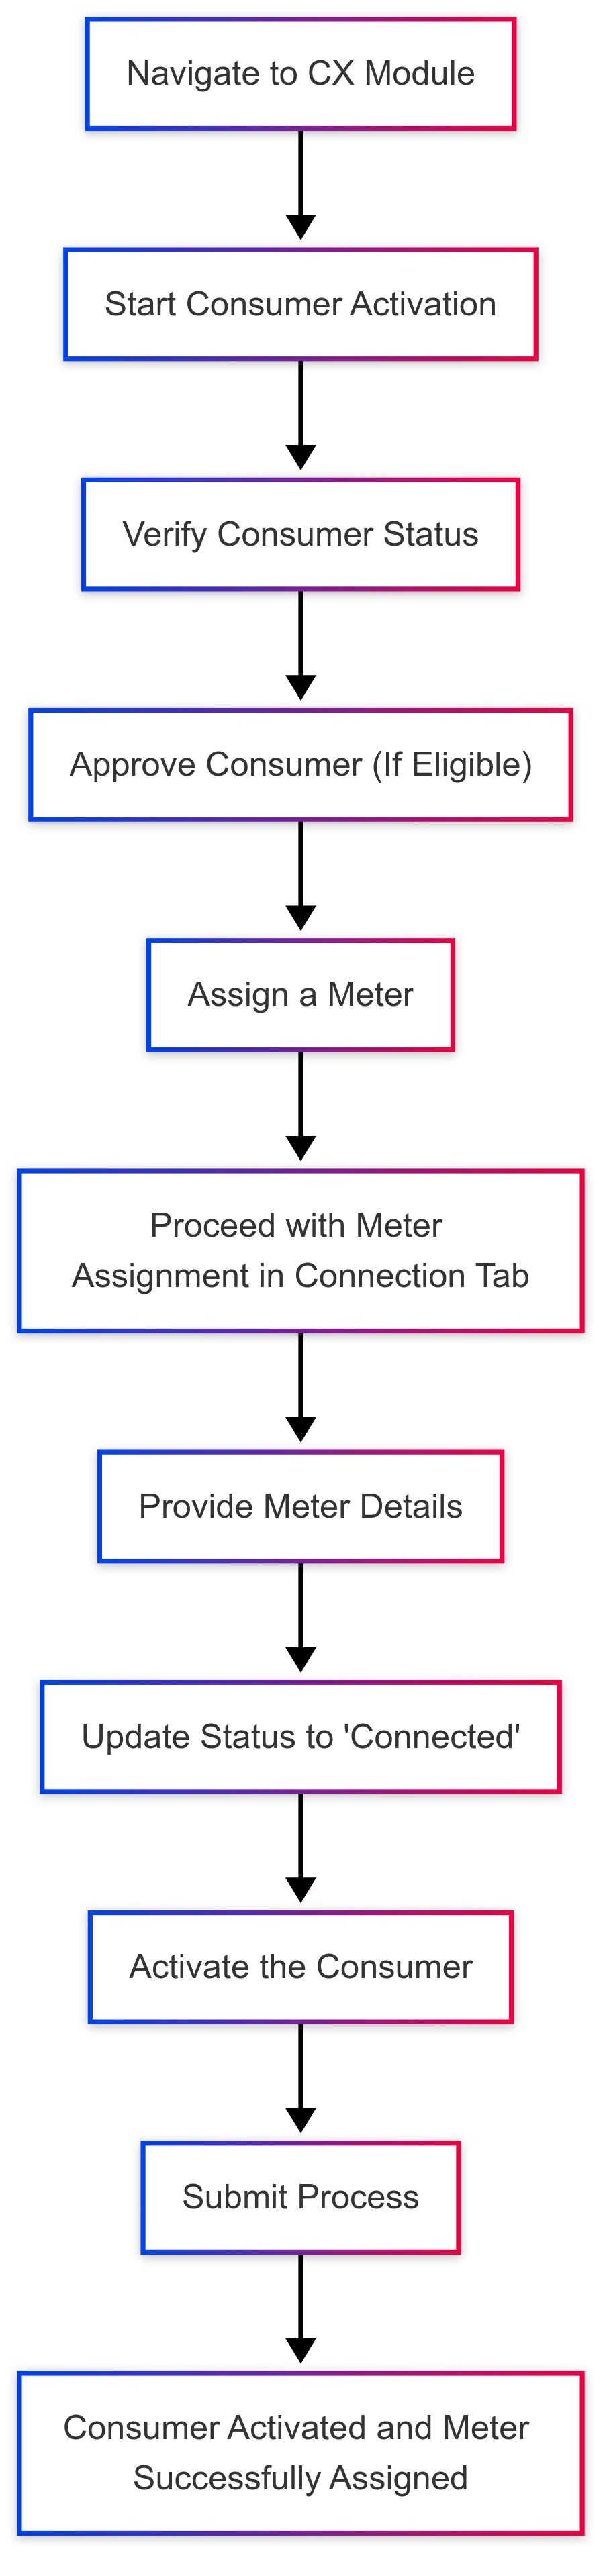
- Access the CX Module from the system dashboard.
2: Start Consumer Activation
- Begin the Consumer Activation process.
- Fill in the required consumer details in the provided form.
3: Verify Consumer Status
- Ensure that the consumer’s status is set to "Created".
- If the status is "Created", proceed to the next steps.
4: Consumer Approval
- The consumer can be Approved by an authorized user.
- After approval, the consumer becomes eligible for connection.
5: Assign a Meter
- In the Meter Assignment section, select an appropriate meter.
- Ensure that the meter status is set to "Installed".
6: Proceed with Meter Assignment in the Connection Tab
7: Status Update to "Connected"
- After assigning the meter, the consumer status will automatically change to "Connected".
8: Activate the Consumer
- Once the consumer is connected, proceed with the final step to Activate the consumer.
- Upon successful activation, the consumer’s status will update to "Active".
9: Submit the Process
- Click on the Submit button to complete the activation and meter assignment.
No Comments